Complete Guide to Sewing Pins: Straight Pins & T-Pins for Every Project
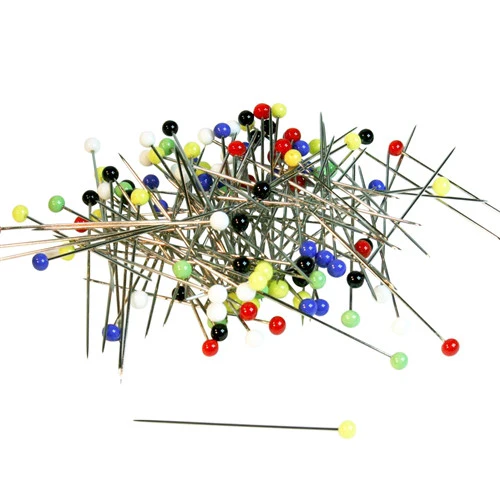
Professional Glass Head Straight Pins
Premium straight pins featuring heat-resistant glass heads in vibrant colors for easy visibility. Sharp steel points glide through fabrics smoothly while the comfortable glass heads won’t melt under iron heat. Perfect for quilting, garment construction, and detailed sewing work requiring precision placement.
Key Features:
- Heat-resistant glass heads
- Sharp steel points
- Vibrant color coding
- 1.75-inch length
- Rust-resistant finish
- Easy grip design
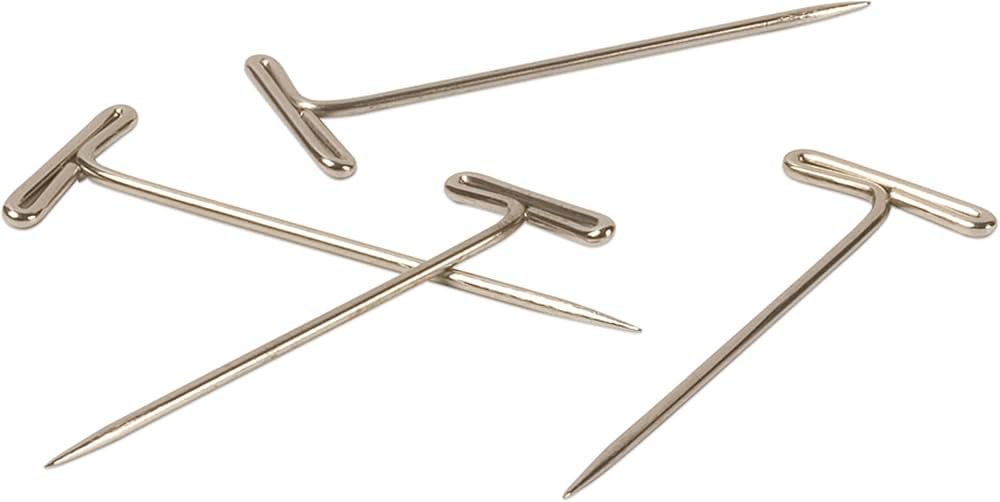
Heavy-Duty T-Pins Set
Professional-grade T-pins designed for blocking, upholstery, and heavy fabric projects. Sturdy steel construction with comfortable T-shaped heads provides superior holding power. Ideal for stretching needlework, securing patterns to cutting mats, and professional tailoring applications requiring extra strength and stability.
Key Features:
- T-shaped grip heads
- Extra-strong steel construction
- 2-inch length
- Superior holding power
- Professional blocking use
- Corrosion-resistant coating
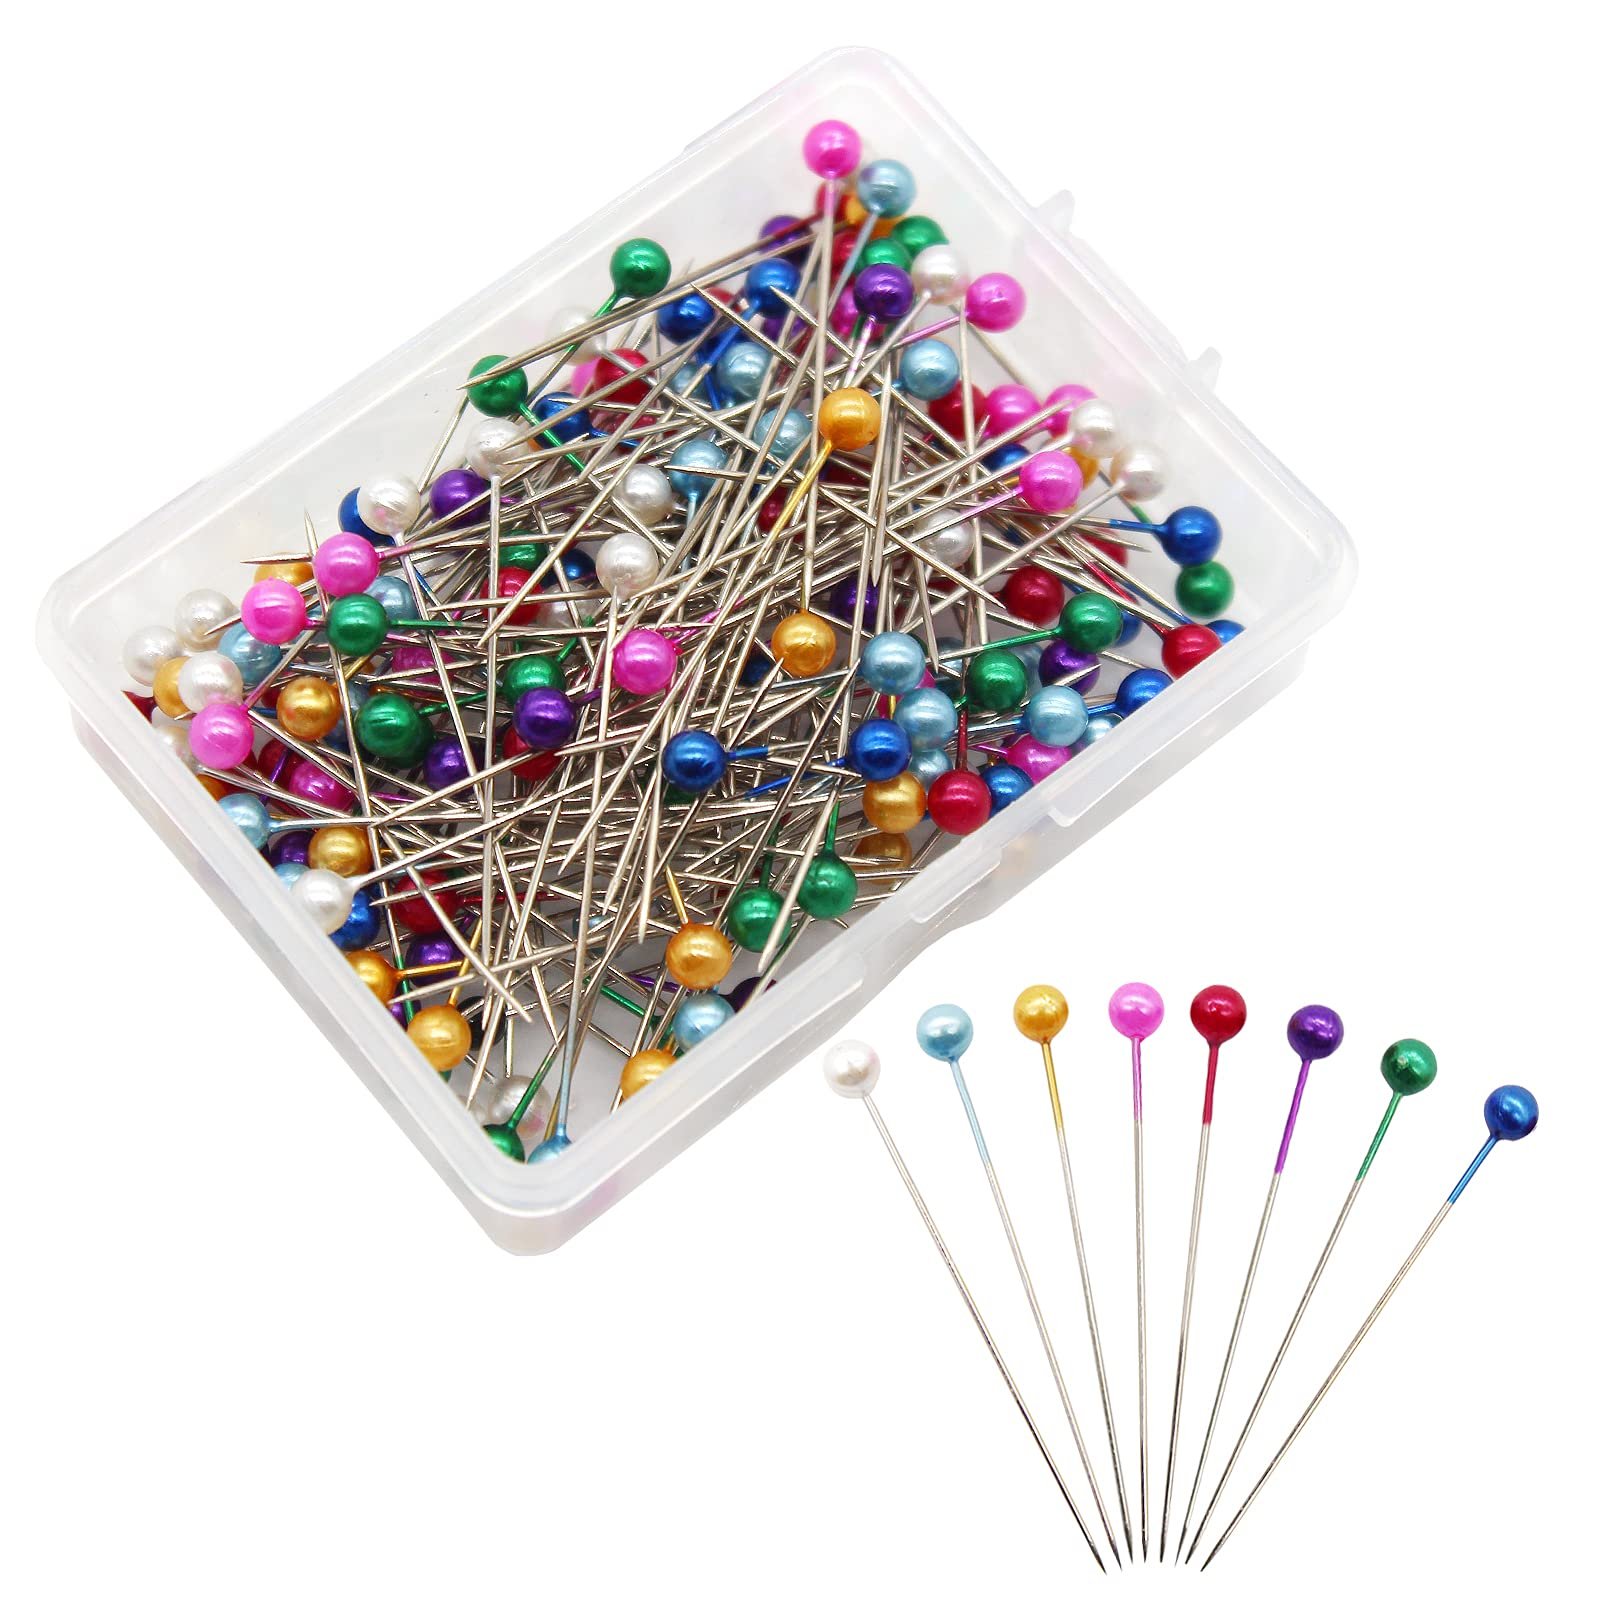
Quilting Ball Head Straight Pins
Specialty straight pins with large ball heads designed specifically for quilting and thick fabric layers. Extended 2-inch length penetrates multiple fabric layers while colorful ball heads remain visible against busy patterns. Heat-resistant design safely withstands pressing during quilting assembly and construction phases.
Key Features:
- Large ball heads
- 2-inch extra length
- Multi-layer penetration
- Heat-resistant design
- High visibility colors
- Quilting-specific sizing
Fine Silk Pins
Ultra-fine straight pins perfect for delicate fabrics like silk, chiffon, and lightweight materials. Thin 0.5mm diameter prevents fabric damage while maintaining secure hold. Sharp points minimize snagging while compact heads allow close placement for detailed work on expensive or fragile materials.
Key Features:
- Ultra-fine 0.5mm diameter
- Delicate fabric safe
- Sharp precision points
- Minimal fabric marking
- Compact head design
- Snag-resistant finish
Understanding Different Types of Sewing Pins
Sewing pins are essential tools that every crafter needs in their toolkit, with straight pins and T-pins being the most commonly used varieties. Understanding the differences between these pin types helps you choose the right tool for each specific project.
Straight Pins: The Foundation of Sewing
Straight pins represent the most basic and versatile type of sewing pins available. These slender metal pins feature a sharp point on one end and a head on the other, designed to temporarily hold fabric pieces together during cutting, pinning, and sewing processes.
The heads on straight pins come in various materials including plastic, glass, metal, and pearl. Glass head pins offer superior heat resistance, making them ideal for projects requiring pressing while pins remain in place.
T-Pins: Heavy-Duty Holding Power
T-pins earn their name from their distinctive T-shaped heads that provide enhanced grip and holding power. These robust sewing pins excel in applications requiring extra strength, such as blocking knitted items, securing upholstery, or working with heavy fabrics.
The perpendicular head design allows for easier insertion and removal while providing a larger surface area to prevent the pin from slipping through fabric. T-pins typically measure longer than standard straight pins, offering deeper penetration for thick materials.
Choosing the Right Sewing Pins for Your Project
Selecting appropriate sewing pins significantly impacts your project’s success and the quality of your finished work. Different fabrics and techniques require specific pin characteristics to achieve optimal results.
Fabric Weight Considerations
Lightweight fabrics like silk, chiffon, or organza require fine sewing pins that won’t leave permanent holes or cause runs. Choose pins with thin shafts and sharp points that glide through delicate materials without damage.
Medium-weight fabrics such as cotton, linen, and wool accommodate standard straight pins with moderate thickness. These versatile sewing pins handle most general sewing and quilting projects effectively.
Heavy fabrics including denim, canvas, or upholstery materials need robust pins with extra length and strength. T-pins often work better for these applications due to their superior holding power.
Pin Head Materials and Benefits
Glass heads offer excellent heat resistance, allowing you to press over pins without melting. The smooth surface won’t catch on fabric, and bright colors provide high visibility against various fabric colors.
Plastic heads cost less but may melt under high heat from irons. They work well for basic pinning tasks where pressing won’t occur while sewing pins remain in fabric.
Metal heads provide durability and a slim profile but can be harder to grip. Ball heads offer good visibility and comfortable handling for extended pinning sessions.
Proper Techniques for Using Sewing Pins Effectively
Mastering proper pinning techniques enhances accuracy, prevents fabric shifting, and creates professional-looking results in all your sewing projects. Strategic pin placement makes the difference between amateur and expert-level work.
Strategic Pin Placement Methods
Place sewing pins perpendicular to seam lines for most accurate results. This positioning allows the sewing machine needle to pass beside pins safely while maintaining precise seam allowances.
For curved seams, use more pins spaced closer together to prevent fabric from stretching or puckering. The additional sewing pins help maintain the intended curve shape throughout the sewing process.
When pinning patterns to fabric, place pins within seam allowances to avoid visible holes in finished garments. Strategic placement ensures pattern pieces remain secure while protecting the visible areas of your project.
Safety Considerations When Using Sewing Pins
Always remove sewing pins before they reach the sewing machine needle to prevent needle breakage or machine damage. Sewing over pins can cause costly repairs and create safety hazards.
Keep pins organized in a magnetic pincushion or container to prevent scattered pins from becoming foot hazards. Proper storage also extends pin life by protecting points from damage.
Inspect sewing pins regularly for bent points, rust, or burrs that could snag fabric. Replace damaged pins immediately to maintain project quality and prevent fabric damage.
Maintaining and Storing Your Sewing Pins
Proper care and storage of sewing pins extends their lifespan and maintains their effectiveness for countless projects. Quality pins represent an investment that pays dividends through years of reliable service.
Cleaning and Maintenance Tips
Clean sewing pins periodically with a soft cloth to remove fabric lint, oils, and residue that can accumulate during use. For stubborn buildup, use mild soap and water, then dry thoroughly to prevent rust.
Store pins in a dry environment to prevent corrosion, especially if you live in a humid climate. Moisture can cause metal sewing pins to rust, leaving stains on fabric and reducing point sharpness.
Check pin points regularly for sharpness by testing on fabric scraps. Dull pins can snag fabric or create larger holes than necessary, potentially damaging expensive materials.
Storage Solutions for Organization
Magnetic pincushions offer convenient storage while keeping sewing pins easily accessible during projects. The magnetic attraction prevents pins from scattering and makes cleanup efficient.
Traditional fabric pincushions work well for frequent use, allowing you to insert and remove pins quickly. Choose cushions filled with materials that help maintain pin sharpness.
For long-term storage, consider organizing different types of sewing pins in separate containers or magnetic strips. Label containers to quickly identify pin types and sizes when starting new projects.
Professional Tips for Quilting with Sewing Pins
Quilting projects present unique challenges that require specialized pinning techniques and specific types of sewing pins. Professional quilters rely on strategic pin placement to achieve precise piecing and smooth quilting results.
Choosing Quilting-Specific Sewing Pins
Quilting pins typically measure longer than standard sewing pins to penetrate multiple fabric layers plus batting. The extra length ensures secure holding power through thick quilt sandwiches.
Bright-colored heads help maintain visibility against busy quilt patterns and prints. Choose sewing pins with heads that contrast with your fabric colors for easy identification during assembly.
Flower head or ball head pins provide larger gripping surfaces that won’t slip through layers easily. The increased head size also makes removal quicker during the quilting process.
Basting and Layer Management
When basting quilt layers, place sewing pins every 4-6 inches across the entire quilt surface. This spacing prevents shifting while allowing flexibility for quilting machine movement.
Start pinning from the center and work outward to prevent fabric bunching or stretching. Smooth each section as you add sewing pins to maintain even tension across all layers.
Remove pins progressively as you quilt each section, staying ahead of the machine needle but maintaining secure holding in unquilted areas. This technique ensures safety while preserving layer alignment.
Creative Uses for T-Pins Beyond Basic Sewing
T-pins offer versatility that extends far beyond traditional sewing applications, making them valuable tools for various crafting and professional techniques. Their unique design provides solutions for specialized projects requiring extra holding power.
Blocking and Shaping Applications
Knitters and crocheters rely on T-pins for blocking finished projects to achieve proper dimensions and shape. The strong holding power keeps stretched pieces in position during the drying process.
T-pins work excellently for stretching needlework, cross-stitch, or embroidery pieces on blocking boards. The perpendicular heads distribute tension evenly without creating stress points that could damage delicate work.
When shaping three-dimensional fabric projects, T-pins provide the strength needed to hold curved or structured pieces in position during construction or pressing.
Professional Tailoring Techniques
Professional tailors use T-pins for draping fabric on dress forms where standard sewing pins might not provide adequate hold. The enhanced grip prevents heavy fabrics from shifting during fitting sessions.
For pattern making and alterations, T-pins secure pattern pieces to heavy paper or cardboard cutting mats. Their strength prevents movement during tracing or cutting processes.
Upholstery work benefits from T-pins’ ability to penetrate thick padding and multiple fabric layers while maintaining secure attachment points throughout the construction process.
Frequently Asked Questions
Mastering Your Sewing Projects with the Right Pins
Understanding the different types of sewing pins and their applications empowers you to tackle any project with confidence. Whether you’re working with delicate silks that require fine straight pins or heavy upholstery materials that demand the strength of T-pins, choosing the right tools makes all the difference in your results.
Investing in quality sewing pins pays dividends through improved project outcomes and enhanced sewing enjoyment. Professional-grade pins with features like heat-resistant glass heads, sharp points, and durable construction provide the reliability you need for consistent, beautiful results across all your creative endeavors.
The techniques and tips covered in this guide will help you maximize the effectiveness of your sewing pins while maintaining their condition for years of faithful service. From strategic placement methods to proper storage solutions, these practices ensure your pins remain ready to support your next creative project.
Remember that sewing pins are fundamental tools that bridge the gap between cutting and stitching, making them essential investments in your crafting success. Choose wisely, use them properly, and maintain them well to enjoy countless hours of productive, enjoyable sewing.